Introduction
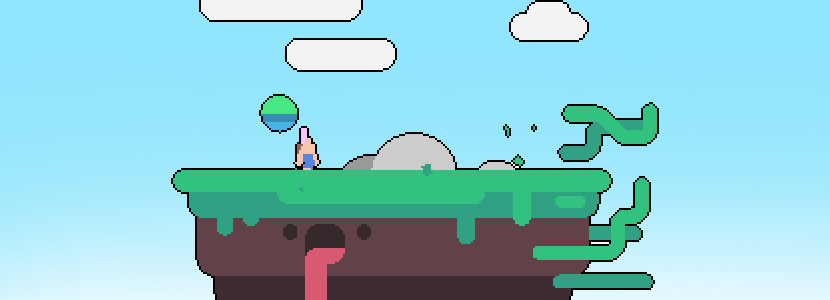
Here’s a little breakdown of the outline post-process I made in Desktop Garden for the 46th Ludum Dare.
Post Process
The post-process setup is fairly basic, a regular blit on the main camera, using a material with the outline shader.
public class PostProcess : MonoBehaviour
{
    [SerializeField] Material material;

    void OnRenderImage(RenderTexture from, RenderTexture to)
    {
        Graphics.Blit(from, to, material);
    }
}
Now everytime we render a frame, it’ll send the main texture to the material before displaying it on the screen. Meaning that we can manipulate the texture however we want in the shader. A simple shader that fetches the main texture could look like this:
Shader "PostProcess/Outline"
{
    SubShader
    {
        Tags { "RenderType"="Opaque" }

        Pass
        {
            CGPROGRAM
            #pragma vertex vert
            #pragma fragment frag

            #include "UnityCG.cginc"

            struct appdata
            {
                float4 vertex : POSITION;
                float2 uv : TEXCOORD0;
            };

            struct v2f
            {
                float2 uv : TEXCOORD0;
                float4 vertex : SV_POSITION;
            };

            sampler2D _MainTex;

            v2f vert (appdata v)
            {
                v2f o;
                o.vertex = UnityObjectToClipPos(v.vertex);
                o.uv = v.uv;
                return o;
            }

            float4 frag (v2f i) : SV_Target
            {
                return tex2D(_MainTex, i.uv);
            }
            ENDCG
        }
    }
}
Outline Shader
The outline shader works this way: for each pixel on the screen, we look at the direct neighbours of this pixel (top bottom left right), and compare their colors against another one (the background color in our case). Then from the number of neighbours that match the reference color we know if that pixel is part of the outline or not.
It worked great in our game because the color of the background is always the same (it’s the key color we use to determine if the image should be transparent).
First we have to sample all neighbours
fixed4 frag (v2f i) : SV_Target
{
    float x = _MainTex_TexelSize.x * _Size;
    float y = _MainTex_TexelSize.y * _Size;

    float4 c1 = tex2D(_MainTex, i.uv + float2(x, 0));
    float4 c2 = tex2D(_MainTex, i.uv + float2(-x, 0));
    float4 c3 = tex2D(_MainTex, i.uv + float2(0, y));
    float4 c4 = tex2D(_MainTex, i.uv + float2(0, -y));

    ...
_MainTex_TexelSize in this case gives us the size of a pixel on screen ( 1 / Screen size ), since our texture takes up the whole screen.
Then we need to check if each color equals our background color, in this case I just take the distance between the two and check if its smaller than a threshold (taking the distances to compare colors isn’t really accurate, but it worked alright for my case).
    ...

    float3 bgColor = 0;
    int nbs = 0;
    if(distance(c1.rgb, bgColor) < _Bias) nbs++;
    if(distance(c2.rgb, bgColor) < _Bias) nbs++;
    if(distance(c3.rgb, bgColor) < _Bias) nbs++;
    if(distance(c4.rgb, bgColor) < _Bias) nbs++;

    ...
And finally we check the number of neighbours that turn out to be background pixels, if we have at least one neighbour and less than 4, it’s an outline.
    ...

    float4 color = tex2D(_MainTex, i.uv); // current pixel color
    if(nbs > 0 && nbs < 4) color = _OutlineColor;

    return color;

    ...